Are you dreaming of a luxurious bathroom with a stunning free-standing tub? Well, let me tell ya, there’s more to it than just picking out the perfect design. Proper free standing tub plumbing is key to making that dream a reality. Imagine soaking in a beautifully designed tub, only to realize the plumbing setup is a nightmare. Yikes, right? Don’t worry, we’ve got your back. In this guide, we’ll break down everything you need to know about free-standing tub plumbing, from installation tips to common challenges.
Now, if you’re like most people, the idea of tackling plumbing can feel overwhelming. But guess what? With the right information and a little bit of guidance, you can turn that daunting task into something manageable. Whether you’re a DIY enthusiast or working with a professional, understanding the basics of free-standing tub plumbing will save you time, money, and frustration.
So, buckle up and get ready to dive into the world of plumbing. By the end of this article, you’ll have all the tools you need to make an informed decision about your free-standing tub setup. Let’s get started, shall we?
Read also:Why Buying A Caracal Cat Is The Ultimate Exotic Experience
Why Free Standing Tub Plumbing Matters
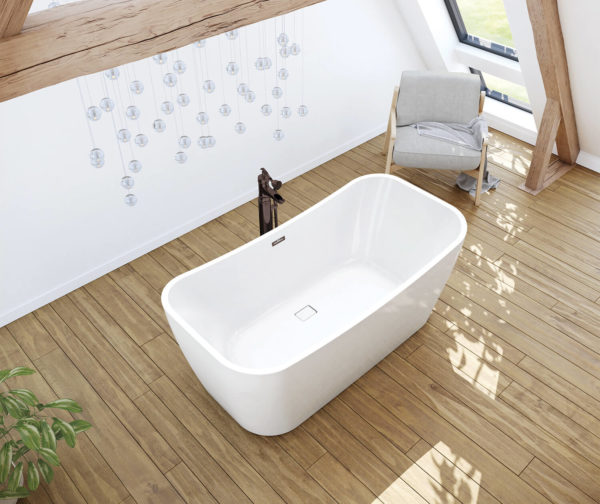
When it comes to bathroom design, free-standing tubs are all the rage. They add a touch of elegance and sophistication to any space. But here’s the deal—without proper plumbing, that gorgeous tub can quickly become a headache. The plumbing system behind your free-standing tub is what ensures smooth water flow, drainage, and overall functionality.
Think about it. You want that tub to fill up quickly, drain efficiently, and look as sleek as possible. That’s where free standing tub plumbing comes into play. A well-planned plumbing setup not only enhances the aesthetic appeal of your bathroom but also ensures a seamless user experience.
And let’s not forget the importance of safety. Proper plumbing prevents leaks, water damage, and other potential hazards. So, whether you’re remodeling your bathroom or building a new one from scratch, investing in quality plumbing is a must.
Common Misconceptions About Free Standing Tub Plumbing
There are a lot of myths floating around about free-standing tub plumbing. Some people think it’s super complicated, while others believe it’s a DIY job that anyone can tackle. Let’s clear up some of those misconceptions, shall we?
- Myth #1: Free-standing tubs don’t require much plumbing. Wrong! These tubs need a solid plumbing system to function properly.
- Myth #2: You can skip professional help. While DIY enthusiasts can handle some aspects, professional guidance is often necessary for complex setups.
- Myth #3: Plumbing is ugly and ruins the design. With the right approach, you can keep the plumbing hidden and maintain that sleek look.
Understanding these misconceptions is the first step toward a successful installation. Now that we’ve debunked the myths, let’s dive deeper into the specifics of free standing tub plumbing.
Key Components of Free Standing Tub Plumbing
Before we jump into the nitty-gritty details, let’s talk about the main components involved in free standing tub plumbing. These elements work together to ensure your tub functions flawlessly.
Read also:Muscogee Creek Nation News Your Ultimate Source For Indigenous Updates
Water Supply Lines
Water supply lines are the lifeline of your free-standing tub. These pipes bring fresh water into the tub, allowing it to fill up when needed. Most tubs require both hot and cold water supply lines, so it’s important to plan accordingly.
Here are a few things to consider:
- Material: Copper pipes are a popular choice due to their durability and resistance to corrosion.
- Placement: The supply lines should be positioned near the tub’s faucet for easy access.
- Shutoff Valves: Don’t forget to install shutoff valves for easy maintenance and repairs.
Drainage System
A proper drainage system is essential for preventing water from pooling around your tub. The drain should be installed at the lowest point of the tub to ensure efficient water removal. Additionally, consider the following:
- Trap Configuration: A P-trap is commonly used to prevent sewer gases from entering your bathroom.
- Pipe Slope: Ensure the pipes are sloped correctly to facilitate smooth water flow.
- Ventilation: Proper ventilation is crucial to avoid clogs and backups.
Choosing the Right Tub for Your Plumbing Setup
Not all free-standing tubs are created equal. When selecting a tub, it’s important to consider how it will integrate with your existing plumbing system. Here are a few factors to keep in mind:
Tub Size and Shape
The size and shape of your tub can impact the plumbing requirements. Larger tubs may need more robust water supply lines and drainage systems to handle the increased water volume.
Material
From cast iron to acrylic, the material of your tub can affect its weight and installation needs. Heavier tubs may require additional support to prevent damage to the plumbing system.
Faucet Placement
Decide where you want the faucet to be located. Some tubs have built-in faucets, while others require separate installations. This decision will influence the positioning of your water supply lines.
Installation Tips for Free Standing Tub Plumbing
Now that you have a solid understanding of the components involved, let’s talk about the installation process. Proper planning and execution are crucial for a successful outcome.
Step 1: Plan the Layout
Start by sketching out the layout of your bathroom. Determine where the tub will be placed and mark the locations for the water supply lines and drain. This will help you visualize the plumbing setup and identify any potential challenges.
Step 2: Prepare the Space
Before installing the plumbing, ensure the area is clean and free of obstructions. This includes removing any old fixtures and clearing out debris. A well-prepared space makes the installation process smoother.
Step 3: Install the Plumbing
With your layout in place, it’s time to start installing the plumbing. Begin with the water supply lines, followed by the drainage system. Double-check all connections for leaks and ensure everything is securely fastened.
Step 4: Test the System
Once the plumbing is installed, test the system thoroughly. Turn on the water supply and check for leaks. Fill the tub and observe how the drainage system performs. This step is critical to ensure everything is functioning as it should.
Common Challenges and Solutions
Even with the best planning, challenges can arise during the installation process. Here are a few common issues and how to address them:
Leaky Connections
Leaky connections are a common problem in plumbing. To fix this, tighten all fittings and use pipe thread sealant to create a watertight seal. If the leak persists, consult a professional plumber.
Drainage Issues
Slow drainage can be frustrating. Ensure the pipes are sloped correctly and the P-trap is properly installed. Regular maintenance, such as cleaning the drain, can also prevent clogs.
Noise and Vibration
Water flowing through the pipes can sometimes cause noise and vibration. To minimize this, secure the pipes to the wall studs and use insulation to dampen the sound.
Maintenance Tips for Free Standing Tub Plumbing
Proper maintenance is key to extending the lifespan of your plumbing system. Here are a few tips to keep everything running smoothly:
- Regularly inspect the connections for leaks and tighten as needed.
- Clean the drain periodically to prevent clogs and backups.
- Test the shutoff valves annually to ensure they’re functioning properly.
Cost Considerations for Free Standing Tub Plumbing
Let’s talk money. The cost of free standing tub plumbing can vary depending on several factors, including the complexity of the setup and the materials used. On average, you can expect to spend anywhere from $500 to $2,000 for a basic installation.
Here’s a breakdown of the costs:
- Materials: Pipes, fittings, and fixtures can range from $100 to $500.
- Labor: Hiring a professional plumber may cost $200 to $1,000, depending on the scope of work.
- Additional Features: If you opt for luxury features like thermostatic valves or advanced drainage systems, expect to pay more.
Conclusion
Free standing tub plumbing may seem intimidating at first, but with the right information and approach, it’s a manageable task. From understanding the key components to tackling common challenges, this guide has provided you with everything you need to know to create a stunning bathroom setup.
So, what’s next? Take action! Whether you’re ready to start planning your installation or want to learn more about bathroom design, there’s always room to grow. Share this article with your friends, leave a comment below, or explore other resources on our site. Your dream bathroom is just a few steps away!
Table of Contents
- Why Free Standing Tub Plumbing Matters
- Common Misconceptions About Free Standing Tub Plumbing
- Key Components of Free Standing Tub Plumbing
- Water Supply Lines
- Drainage System
- Choosing the Right Tub for Your Plumbing Setup
- Installation Tips for Free Standing Tub Plumbing
- Common Challenges and Solutions
- Maintenance Tips for Free Standing Tub Plumbing
- Cost Considerations for Free Standing Tub Plumbing